| Question: |
| How do I set up multiple logos and letterheads to use across different projects? |
| Answer: |
|
eSUB Support will upload any additional logos and letterheads as a courtesy to our subscribers. Please email the following to support@esub.com:
- Your logo graphic
- (optional) Your letterhead graphic
- (optional) Contact information you would like to be displayed on your letterhead
If you would like to upload the files yourself, please follow these steps:
Step One: Upload your secondary logo and letterhead to eSUB
- Select any project. Note: Once you upload additional logos and letterheads, they will be an option under any project.
- Go to Files > Company Files
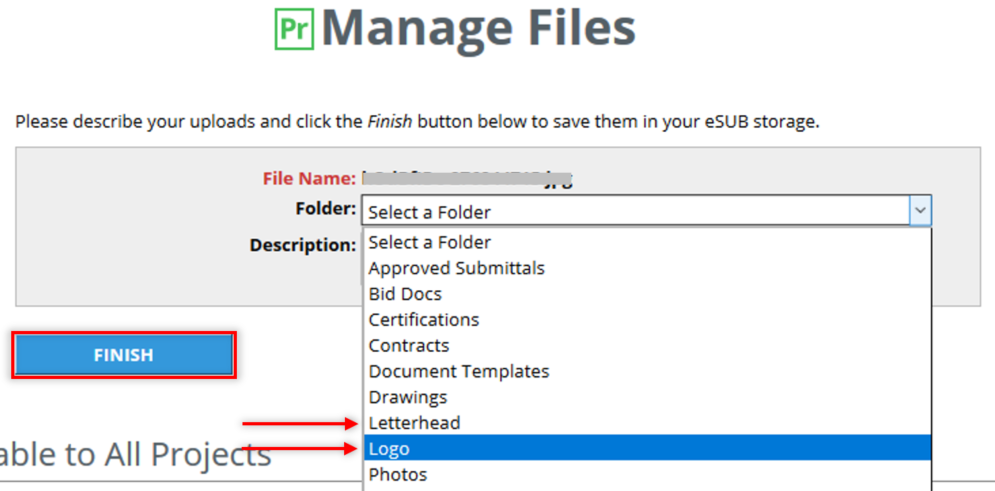
- Select Upload File

- Select the option (My Device, Dropbox, Google Drive or Box) to upload your logo and letterhead. You can upload both at the same time.
- Once the file is queued, select Upload
- Select the Letterhead and/or Logo folder (depending on the graphic you are uploading)
- Enter a description for the file in the Description field. This will be the name of your logo/letterhead when assigning it to a project.
- Select Finish
Note: These two folders (Letterhead and Logo) are created by default when your eSUB Account is setup. If you have renamed them, you may need to reach out to support@esub.com to determine the appropriate folder.
Step Two: Configure the project to use your secondary logo/letterhead
Select the project, then:
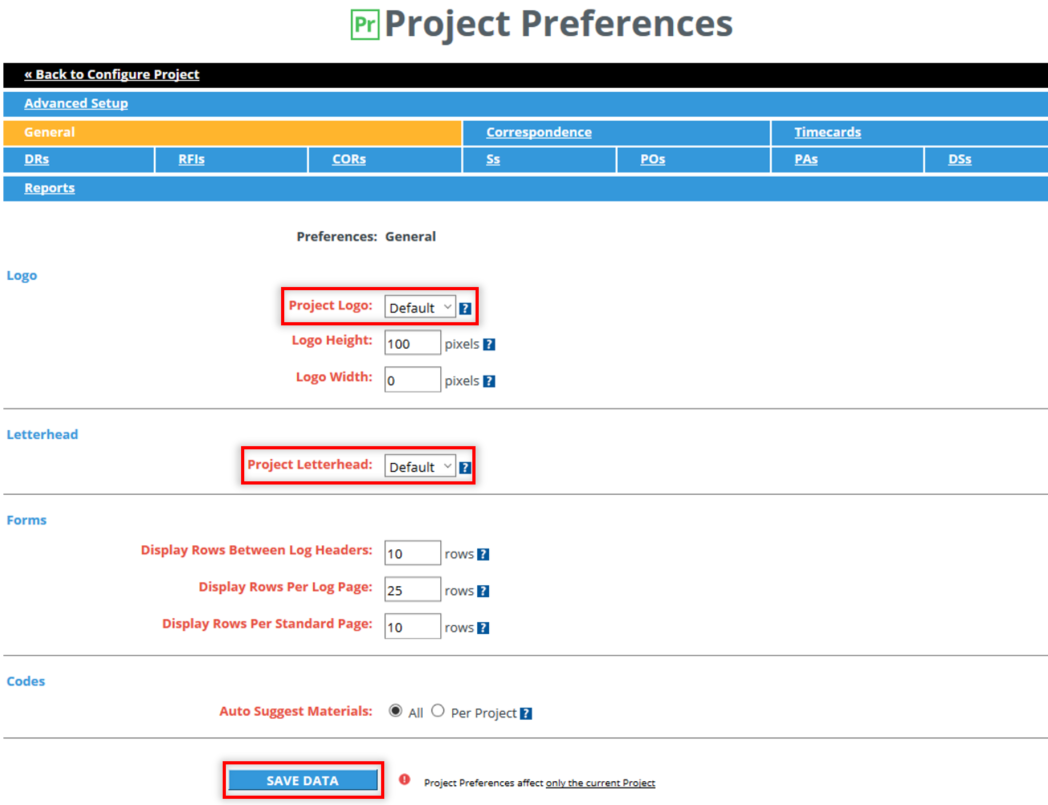
- Go to Project > Configure > Advanced Setup > Project Preferences
- Locate the Project Logo drop-down menu and select the desired logo for that project
- Locate the Project Letterhead drop-down menu and select the desired letterhead for that project
- Select Save Data
|
Please do reach out to eSUB Support if you require further guidance.

Comments
0 comments
Article is closed for comments.